Wednesday, September 9, 2009

Leather Repair Artistry

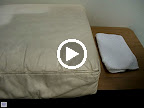
The following two photos show a before and after sequence of damaged printed leather. Nail polish got on to the leather and the client removed the nail polish, taking the color of the leather with it leaving a visible bleached spot. In their effort to clean the nail polish, the client rubbed the leather aggressively with an abrasive tool. Notice the score marks above the bleached spot.

The afflicted area was meticulously hand colored with an artist brush. Getting the color right is the key.


Just another day at the leather restoration studio of Advanced Leather Solutions in Hayward, CA.

Copyright 2010, Kevin Gillan
Posted by Picasa

Tuesday, July 28, 2009

Leather & Vinyl Combination on Furniture - Good or Bad Idea?

When buying leather furniture, ask this question, “Is it all leather?”.

Many Advanced Leather Solutions clients are surprised to find out that the “leather” furniture they purchased is in fact a leather and vinyl combination. They make this discovery when they notice splitting or cracking in the material. This most often occurs in the side panel of a seat cushion, or at a stress-bearing seam (outside arm, outside top of backrest, etc.).


The typical construction of a leather/vinyl combination is to use leather on those areas that come in contact with your body - the seat cushion top, the inside backrest and the tops of the armrests. All other panels, including the outside back, side panels, sides of the seat cushion, and arm- and back-rest anchor-panels are vinyl.

Here’s the problem. Vinyl is a synthetic material (and has nowhere near the tensile strength of leather). Leather is an organic material. The two materials are fundamentally incompatible when joined together along a seam. This is particularly apparent on a seat cushion (see the picture) where the vinyl side panel (boxing panel) is sewn to the leather top panel. Leather is porous and loses its moisture through evaporation (which is why leather should be conditioned regularly). To replace this lost moisture, the leather literally wicks (draws by absorption) oils from the vinyl where the two materials are in contact with each other along a seam, reducing the oil content of the vinyl. As the vinyl loses its moisture, it also loses its ability to flex, and subsequently cracks. This is most commonly seen as fissures that start at stitch-holes and run perpendicular to the seam line. Over time, these cracks will only worsen. Once this starts, it is not repairable.

Leather/vinyl combination manufacturing strategies (sometimes referred to as leather-mate, leather-match, or other marketing terms) are a ploy by the manufacturer to reduce cost. And in this reduction in materials cost for the manufacturer, the life expectancy of the furniture is greatly diminished. By as much as 75%, depending on usage patterns.

Recliners are the most common type of furniture for leather and vinyl match. One prominent San Francisco bay area retailer told us that 70% of all supposed leather recliners are actually leather/vinyl.

If you expect a long, useful life from your leather furniture - be careful at the point of purchase. Ask the question, “Is the piece all leather?” If the answer is yes, then make sure that appears on your sales reciept. You can check by examining the back side of the material. If it appears to be a fuzzy material or a woven fabric (usually white, but can also be gray, black, or brown), it’s vinyl. If it looks like suede, it’s probably leather.

If you already own a leather/vinyl match, pay careful attention to your conditioning regimen. We have great Leather Care products for exactly this purpose. If the leather is regularly moisturized, it will have less of a tendency to draw the oil from the adjacent vinyl panel. Also, when sitting on or exiting the seating area, try not to put undue stress on the seams where the arm or back pillow attach to the frame.

Copyright 2009 Kevin Gillan

Tuesday, July 21, 2009

Is it real Leather?

This is a common e-mail for me....

How can I, as a consumer, determine the difference between real leather and faux? I've been shopping for a sofa, love seat and recliner for my home and have looked at all kinds of products. Every store I visit has a different take on what is real and what is a good quality. I can usually recognize real leather, but not always ----- what are the obvious clues??????????

In this blog entry, here is my advice for the consumer that is shopping for leather furniture, to determine if its the real deal or synthetic.

1. The best test is the inside of the material. The inside of leather will appear as suede whereas the inside of synthetic has a woven typically fuzzy, often white material.

2. Look at the cross section. Leather is one material (a skin) whereas synthetic is a bonding of plastic surface to a fabric substrate.

3. Pinch it. Leather is thicker, vinyl is thinner. To become familiar, find something you know is leather and pinch it to get a benchmark sense of the thickness.

4. Look for imperfections (hide scars, bug bites, etc.) Leather hides are not perfect across the surface (like knots in wood). Vinyl has no surface characteristics as it's man made.

5. Look for a repeating pattern. Like wall paper, vinyl is manufactured with a specific pattern that repeats itself.

6. Large versus small panels - Leather is from an animal that has limitations dimensionally (ever see a 20 foot cow?), vinyl is produced on a roll with no limits to size.

7. Grain Pattern - If the grain pattern is totally uniform its probably vinyl. Nature does not produce complete uniformity.

What is NOT the real deal - Vinyl, Bonded leather, Bicast leather, ultra suede. Bonded and bicast are equivalent to pressed wood or fiberboard. They are made from what used to be leather waste material. Read the article about bi-cast leather for more information. that then has a heavy urethane coating on the surface. The typical color is a glossy brown. Bonded and bicast lack durability and present all kinds of problems.

What is real, but lacks durability - Split-hide. This is the remnant of a leather hide after the epidermis has been split away.

Ask the following questions:

1. Is it top grain leather? Top grain means the epidermis of the skin is intact. This is important as the epidermis is where the durability of leather comes from.

2. Is it all leather? Many manufacturers cut costs by building leather furniture with part leather and part vinyl. This is not death mind you, but a potential problem along the seam where the leather and vinyl meet.

3. Can I see a swatch of the material used? Look at it front and back. Is it the same color on top and on the inside? Is it suede on the inside? Most leather manufacturers give the retailers samples of the leather they use for exactly this reason. Be wary if they can't produce a swatch for your examination.

4. Who is the manufacturer? Do your research and look up who built the piece. There are several quality manufacturers - American Leather, Hancock and Moore, Drexel Heritage, The Sherrill Collection, Leather Craft, Ekornes (Swedish). And then there is the very high end European manufacturers - Roche Bobois, B & B Italia, Cassina, Gamma, de Sede.

Beware of claims like "it's Italian leather." It means nothing. Natuzzi, an Italian manufacturer of leather furniture has three plants Italy, Brazil and China. Just because it has an Italian name doesn't mean its made in Italy.

Ask penetrating questions. If you aren't comfortable with an answer, run.

Some manufacturers like Nicoletti had an impeccable reputation 10 years ago. Their products today simply don't measure up. So don't rely on historical performance alone. The industry is being decimated by cheap foreign imports. To combat the onslaught some companies have capitulated and moved their plants to cheap labor countries and are now producing junk.

The unfortunate fact is there's a ton of misinformation on the web, and in the leather furniture retail channel. The probability is pretty high that you'll know more about leather now than the sales person who is selling the furniture. For more detail, visit our web-site. www.advleather.com. Go to the leather care section. If your sure its leather, the next question is what type of leather will perform best in your environment? From our web-site look at the features of the different leather types and make a determination of what will work for you. Then, pepper the sales person with questions.

Happy shopping!

copyright 2009 Kevin Gillan

Friday, July 17, 2009

How a supposed leather expert be so wrong?

The web can be a source of excellent information. However, there is also hype, myths and misinformation that can have serious consequences.

Recently, a purportedly knowledgeable leather craftsman wrote the following as part of a guideline for painting leather. This is in an article that has been scattered throughout the Internet.

He wrote:

“You can clean the leather by mixing equal parts of warm water and bleach…”

Did he actually say bleach?

I have to set the record straight. Bleach has a ridiculously high alkalinity (base substance). It registers 12.6 on the pH scale. The only household item more alkaline is lye. On the other hand, leather is acidic. Leather comes in around 4.5 to 5.0 on the pH scale.

A brief chemistry lesson: The pH scale is logarithmic with pure distilled water registering 7.0, the mid-point between 1 --- the acidic peak and 14 --- maximum alkalinity. So a measure of 8.0 is 10 times more alkaline than 7.0 (water) and 9.0 is 100 times for alkaline than 7.0, etc.

When an alkaline (base) substance and an acidic substance are introduced to each other, a chemical reaction occurs as the two attempt to neutralize each other. The bigger the differential, the more dramatic the reaction. Mix bleach with an acid and watch the fireworks!

The magnitude of differential between bleach and leather is millions fold. Put bleach on leather and the reaction will cause severe damage, accelerating its demise. This is basic chemistry 101. Bleach will destroy leather, turning it to mush, like wet cardboard.

This simple understanding of basic chemistry is what sets Advanced Leather Solutions apart. We understand these fundamentals and have constructed our SG series of leather performance products from this foundation. All SG Series leather care products (both cleaners and conditioners) are pH balanced to leather. We’re not about a “seek and destroy mission,” rather we’re about prolonging the life of a valuable asset --- your fine leather. Whether it’s leather in your car, or your leather furniture, Advanced Leather Solutions has the right chemical engineering built in our products to extend the useful life of your leather, not destroy it.

Copyright 2009 Kevin Gillan

Sunday, July 12, 2009

Effect of Body Oils on Leather

Body oils can rot leather. Check out this picture.


What you see is leather that has been saturated with hand oils from the people who sit on this furniture. The pH of the person's skin output is considerably more acidic than the leather. This pH differential causes a chemical reaction as the pH of the leather (about 5.0) and the pH of the individual using the furniture are quite different. This is NOT a universal problem but nonetheless its a common problem for us as professional leather technicians.

The chemical reaction mentioned breaks down the fiber structure of the leather, literally rotting it.

Once leather reaches this state, it can not be saved. Instead the offended panel requires replacement. That is an expensive procedure and may not be justified. So, don't let your leather get to this state.

With Advanced Leather Solutions oil extraction procedure, you can save the piece if you draw out the offending body oils before they have this type of irreversible impact.

Copyright 2009, Kevin Gillan

Before and After Pictures from Advanced Leather Solutions Studio

Click on this link and you'll be taken to a brief example of before and after pictures of a sampling of projects at Advanced Leather Solutions Hayward, CA studio.

Before and After pictures.

They represent a very small cross section of our work. I have over 16,000 photos stored on my hard drive of projects we've worked on at our restoration shop over the past 10 years. Prior to that, we weren't documenting our projects photographically. With 21 years experience in this business, we've encountered pretty much everything you can imagine.

Every project is unique based on the type of leather, nature of damage, the environment its been exposed to, how it's been cared for, age of the leather, goal of the client, etc. From color change of existing leather, to selective leather panel replacement, we've done it all.

Copyright 2009, Kevin Gillan

Friday, July 10, 2009

What Makes a Good Leather Conditioner?

Why should I condition leather? What does a leather conditioner do anyway?

These are common questions from consumers. Here's the deal: The primary goal of a leather conditioner is to replace lost moisture.

To understand the need for leather conditioning requires a little background. In the tanning process leather is infused with natural oils that reduce friction within the leather fiber bundles. This, in combination with milling (like massaging) the leather establishes a supple, soft leather. At the point of manufacture, these oils equal to about 25% of the total mass of leather.

Here's the rub: The oils are volatile. This means they evaporate. The rate of evaporation depends on variables like heat and humidity. In warm, dry regions like the desert southwest of the United States, leather will lose its moisture content much more rapidly than in the cooler and more humid coastal regions. So with regular conditioning you prolong the life of the leather by maintaining the appropriate moisture content. This all presumes the conditioner has the correct chemical engineering.

As professional leather repair and restoration specialists, clients contract with us to clean and condition their leather. There are a zillion leather conditioners on the market. We tested dozens of conditioners seeking the one that would perform the best. They range from watered down versions of neatsfoot oil, to greasy gloppy Vaseline like products, to stinky, sticky, gooey pastes. We found products where the pH was completely out of whack actually shortening the life of leather. We discovered a lot of nonsense claims like - made from secret formulas handed down from Norwegian antiquity, or, has UVX-15 added, whatever that is. This was not working for us. In the end, we needed to be in control of quality and performance not overwhelmed by hype. Like an earlier post for leather cleaners, we knew the attributes of what we wanted in a leather conditioner so we developed a wish list and turned it over to our chemists. For Professional grade performance a leather conditioner must include:

--- Quality ingredients
--- Cream like consistency
--- pH balanced for leather
--- Good tactile presentation
--- Non-darkening
--- Protective resin
--- Pleasant "new leather" scent
--- Non-greasy formulation

Our chemists were on a mission to visit tanneries, talk with the folks at the tanners council, even dialogue with the leather preservation and conservation specialists at the Smithsonian. We learned who are the best chemical supply companies that support the leather tanning industry in the USA and secured lots of sample ingredients from them. Then the testing began.

Through this effort SG - 25, our leading leather care product was created. Besides the finest ingredients, what makes this product different than anything else on the market are two unique twists. They are the addition of a protection element and the addition of an anti-bacterial/anti-virus agent.

We understand usage patterns of leather in cars and furniture as we see how people use their leather products in our leather repair and restoration business. There is a lot of abrasion wear, especially in automobiles as the driver slides across the seat when he/she enters or exists. For long term wear resistance, we wanted a protective coating to be part of the conditioning process. So SG - 25 not only conditions leather with added moisture content, but also builds a protective clear coat.

Furthermore, in active household environments with children and pets, we wanted a product that dis-allowed the development of bacteria on the leather. So we added the anti-bacterial component.

We also wanted a product that would be easy to apply, not feel greasy or sticky, be pH balanced with leather and do what it supposed to in adding the appropriate replenishing oils back into the hide. SG - 25 has all of these attributes. It is available through our Hayward, CA leather restoration studio as well as both of our web-sites (advleather and DIYLeatherSolutions) without a lot of fanfare or marketing hype. Both consumers and professional technicians that use it have reported to us a steady stream of glowing commentary.

Perhaps it is time to pump up the marketing engine and let the world know about the best-of-the-best leather conditioner available - It is our own Advanced Leather Solutions' SG - 25.


Copyright 2009, Kevin Gillan

Wednesday, July 8, 2009

What makes our Do It Yourself Leather Restoration System Effective

This paragraph is from an e-mail received today.

"Our leather furniture is Italian Natuzzi Leather, ivory color, has worn. I tried another brand of leather dye kit about 2 years ago and it looked great for about a month. Then it started to crack and fade." -- SN, Texas

We have received several e-mail like this one over the last year or so. Meanwhile, we at Advanced Leather Solutions have had wonderful success with our Do-It-Yourself (DIY) leather restoration system. Clients have transformed automobile leather as well as home furnishings from worn, faded, stained, tired leather back to like-new condition. And, it's passed the test of time.

The reason for our success is that our DIY process follows the same steps we use professionally in our Hayward, California leather restoration studio. With 21 years experience and many thousands of leather repair and restoration projects under our belt we understand what it takes to restore leather. We know empirically what works and what doesn’t.

There is much more to the story. Our R & D efforts gave us the background into why it works. We have drilled deep to understand the fundamentals that support the science of leather restoration. The knowledge we’ve gained empowered us to develop products from the finest ingredients available, thus giving us total control over our product quality. We know they work. We as professional leather technicians use them every day. They are proven in the real world standing up to the test of time. These are the same products we make available to consumers in our DIY Leather Restoration kits.

Having the best products alone will do little without knowing how to use them. The foundation of success rests on two powerful pillars. Products and Knowledge.

We are experts at leather restoration. Knowing how to do something well is a good starting point. But that’s not enough. You also have to know how to transfer that knowledge to a novice who does not have any experience in leather restoration. With a background in adult training, we have developed the “how-to” instruction set using a well thought out written guide in combination with a DVD based visual reference. These knowledge tools empower a novice to success. While the overall procedure can be intimidating, we’ve simplified the process by breaking it down into easy-to-grasp steps.

Look at this diagram to see the steps used with DIYLeatherSolutions system. (Click on the diagram to enlarge.)


Copyright 2009, Kevin Gillan

Tuesday, July 7, 2009

Another Do It Yourself Leather Solutions Success Story

One of the most rewarding aspects of working for Advanced Leather Solutions is the steady stream of kudos we receive from our clients. The reaction most people have to our Do It Yourself kits is very positive. We've become somewhat "oh-hum" about their enthusiastic delight with their results.

A common comment from many of our clients after they complete their leather furniture restoration project is that the furniture looks better than they day they bought it. Now, really, I don't believe that to be true, but it certainly looks better than the day before they started the transformation.

Here is an example of an e-mail I just received that makes the point.

"Kevin,

"Attached are before and after photos of our sofa. It might as well be brand new! The color match is perfect and the finish is like new. I appreciate all that you and your team do. The kit was complete and well-organized, with easy-to-follow instructions. The DVD was very helpful as well. I also appreciate the generous supply of materials in the kit. We are well-prepared for the future.

"I'm so glad that I found your website. My family loves this sofa and your process helped save it! I'm telling everyone about ADVLeather.com!

Thanks,
Ron"

Here are Ron's Before and After photos...


<----- So as you can plainly see, the system works beautifully. ----->

Wednesday, July 1, 2009

Nubuck (brushed leather) and Suede Cleaning

Suede and nubuck are versions of leather with a nap. A common characteristic is that they are both highly porous. This means that any liquid spill rapidly soaks in. The result is generally a stain representing the coloring agent or solids after the moisture evaporates away. This means any liquid cleaner will be useless as it also will simply soak in. Leather cleaners resolve what is on the surface, not a stain inside the leather. A stain in nubuck or suede is sort of like a tattoo in your skin. You can't clean it off. The only exception is if the stain is made up of solids on the surface (like food particles stuck to the leather).

The professional leather technicians of Advanced Leather Solutions use a different technique.

Instead of using a "wet" cleaning strategy, we use dry abrasion or sanding technique. First some background. Nubuck is created by sanding leather which raises a nap. Suede on the other hand is the inside of the hide, not the epidermis or grain side. In either case there is a nap and it's porous.

When a stain develops, the dominant component of that stain is in the nap. The basic idea is to sand or abrade away the ends of the nap and re-nap simultaneously. As a technician, I use a variety of tools ranging from a nubby, stiff towel formed into a ball in my hand to a medium grit sanding tool. Most commonly I use either a soft-bristle nylon brush, or 400 to 600 grit wet/dry sandpaper.

Abrasion will remove the ends of the nap, any surface solids and free up the nap fibers. The technique often resolves the stain completely and at a minimum will lighten the stain, and restore the nap. In those cases where the staining agent is known to be solids on the surface of the leather, and to be water-soluble, then to pre-dampen the stain with a damp, white cotton cloth before using the abrasion method may have some effect. Occasionally, I will very carefully use the end of a razor blade to gently pick off solids that are stuck to the leather.

If you are using something with little abrasion capability, like a nubby towel, you can be aggressive in application. On the other hand, if you step up to a medium grit sandpaper, you must be very gentle in application. As a general rule, the more aggressive the tool, the lighter the application, else you'll leave score marks in the leather. Do not be overly aggressive. Here are some additional "Does and Don'ts."

---- Do not focus exclusively on the stain. Rather, blend to the surrounding areas.
---- Do not start with the most aggressive abrasion tool. Start with a light tool and gradually step up more aggressive sanding tools.
---- Do not abrade in only one direction. Move your abrasive material side to side and up and down.
---- Do not dive right in. Start in a non-obvious area first to see the effect of the sanding tool.
---- Do not expect perfection. Instead, the goal is to minimize the stain to the degree that it is far less noticeable from five feet. If that happens, be happy.

Expect some lightening of the leather. Success is dependent on the depth of the stain, and its chemistry. Caustic fluid like coca cola will leave a reference even after the stain as been resolved as it alters (erodes) the topography of the hide.

If the stain is not resolved with moderate effort, consider contacting Advanced Leather Solutions for advice prior to any more aggressive attempts. When completed, wipe that area with a dry white towel to remove any leather dust created. Do this several times, turning the towel to a clean section each time.

For instances where topical soiling or discolorations cannot be resolved with this methodology, please visit our services page, for more information about our leather repair and restoration services, and why cleaning alone may not be enough of a remedy.

Finally, know the distinction between real suede and ultra-suede. Ultra-suede is a synthetic and is generally very thin. If you aggressively sand ultra-suede, you'll quickly sand through the material.

Copyright 2009 Kevin Gillan

Sunday, June 28, 2009

What Makes a Good Leather Cleaner

There are dozens of leather cleaners available on the market. How do you choose which one is right for your leather?

The short answer is to ask a professional leather technician who understands the chemistry of leather and who professionally cleans leather for a demanding clientele.

Our leather technicians of Advanced Leather Solutions have been cleaning leather for more than 20 years. They have tested all kinds of leather cleaners. In the end, to control quality and improve effectiveness, led them to work with our chemists to develop the best possible leather cleaner.

A performance wish list was created:

--- effective cleaner that would gently lift ground-in soil from the leather.
--- degreasing agent to resolve topical greasy residue.
--- pH balanced to the leather so as to not damage the leather.
--- creamy consistency so you can see it's application.
--- pleasant odor.
--- non-darkening formula for application to delicate leather.

Our chemists determined that the cleaner should be surfactant based for the best gentle, yet effective cleaning power. A surfactant will lift soil particles off the leather's surface for easy removal when you wipe away the soapy residue.

They also determined that is should contain a degreasing agent to resolve surface grease and oils. That presented a serious problem. Surfactants and degreasers are incompatible with each other. Like oil and water, they separate from each other in a bottle. So, our cleaver chemists came up with a way to allow them to co-exist through a trade secret combination of high-speed mixing and emulsifiers. That is a significant break-through.

The resulting mixture was too alkaline for leather as leather is acidic (4.5 - 5.0). So the pH was adjusted. You see, a leather cleaner that is not pH balanced to leather will do permanent damage as a cleaner's alkalinity will accelerate the breakdown of leather. So a cleaner with the wrong pH does far more damage than good. I bet you didn't know that.

Thickeners and other chemistry's were then added to make it creamy, and easy to manipulate or control on the surface and not soak into the leather.

Thus, SG - 5 was born.

The next break through was in application. We needed a cleaning tool that will gently agitate the leather's surface and allow the cleaning properties of SG - 5 work most effectively. After testing dozens of applicators, we've determined the best to be an exfoliating glove. We call it a "Leather Lather Glove." It's a wonderful tool, allowing excellent finger dexterity to get into the crevices and creases. It's gentle abrasive action won't scratch the leather yet it helps to gently scrub away soil and grease.

Finally, a micro-fiber towel is the best tool for removing the soapy residue as it's lint free and very absorbent. So you are not just pushing the soil around the leather, rather picking it up off the leather's surface.

SG - 5, with an exfoliating glove and micro-fiber towel works wonders in cleaning leather. As my father used to say, if you're going to do something, you may as well do it right. If you are going to clean your leather, use the best, safest cleaner that was developed and tested in the most rigorous laboratory --- in the hands of professional leather technicians. Simply put, use what the pros use.

Here is a brief video that shows the cleaning power of SG - 5.

From SG - 5 demonstration


To learn more, go to our web site: www.advleather.com

Copyright 2009, Kevin Gillan

Saturday, June 27, 2009

Leather Furniture Restoration - A Business Opportunity

This blog is intended to offer information about leather furniture repair and restoration. There may be some interested in this field as a business opportunity. Or have a related business like wood furniture repair and restoration and are interested in new revenue opportunities. Consider that the world of leather furniture restoration awaits.

Pent Up Demand

Let’s look at the fundamentals. Over the past 20 years the install base of leather furniture in residential and commercial space has exploded. In the United States alone there are ten’s of millions households and offices with leather furniture. While some leather pieces age gracefully, after years of use the vast majority show wear and tear, fading, staining and other unsightly use related issues. Most people think that their leather furniture has to be sent to the landfill when it reaches this condition. If it was a quality piece then this is not true. If the fundamental fiber structure of the leather is still intact, then that old tired looking sofa can be refinished essentially to like-new condition. Bottom-line --- there is huge pent-up demand in people’s homes and offices all across North America waiting for your attention.

You can drill into this market with our help. We partner with you. No special skills are required on your part as we do all of the technical work --- the leather analysis and color matching for you. We prepare a Leather Restoration System “in-a-box” for your client. All you have to do is follow the instructions (written and DVD). You’ll transform your client’s old tired leather furniture to like-new condition.

Here's a good example.


Transformed to this...


We Team With You

There are a number of ways this system can work for you. The process doesn’t require a professional shop. You can have a mobile leather restoring business, solving your client’s leather furniture problems in their home or office.

An example scenario involves a site visit where you inspect the target furniture. You collect a sample of the client’s existing leather, take some digital photos and send that off to our technical staff. With our help, together we’ll determine of the piece is a candidate for restoration.

Our Job

Advanced Leather Solutions takes the responsibility for the technically difficult tasks --- leather analysis, (determines priming chemistry) and color matching. We custom create a Leather Restoration System for that specific project and ship. The system includes everything you’ll need to complete the project. We then stand ready to support your efforts. We’ll answer all questions helping to ensure complete success for you and your client.

Your Job

You schedule a return visit to do the work. With our guidance and Leather Restoration System, you’ll transform your client’s leather furniture to like-new. Most projects can be completed in a day or less, large projects may take longer.

You can choose to do the work on-site or at your own location, even your own garage.

We know this system works. With hundreds of DIY clients throughout North America we have a proven system. If the average consumer can successfully complete the project, so can you. Check out the video from FOX News in Dallas, Tx. Find it on our DIY Leather Solutions web site.


What Does This Mean For You

Basically it boils down to broadening your market and skills leading to more money in your pocket.

Working with us on a professional partnership basis is a painless way to get into the leather restoration market. Because we’re involved with the technically difficult aspects you can get into the business of leather furniture restoration without a lengthy and demanding apprenticeship.

Whether you have an occasional client or decide to focus your energy specifically in the field of leather restoration, the financial rewards can be considerable. Beyond the dollars from any specific project, the client’s are typically astounded at the transformation. Word-of-mouth in your local market takes off from there seeding future business.

We have over 20 years experience in the leather repair and restoration business. With our experience and your hands on-site, you can tap into the pent up demand.

Call us or send us an e-mail and we’ll discuss the specifics. For more information please email Kevin@advleather.com or phone us at 1-800-541-5982

Friday, June 26, 2009

Leather Tanning Process Outlined

At Advanced Leather Solutions we are constantly working on leather repair and restoration projects. For us to do our job right, we must have a deep understanding of leather. In that context, knowledge of the tanning process is useful. What you will learn is that not all leather is the same. The differences are broad and varied. It's the specific processes the hide is goes through that determines its characteristics.

The following details are posted for those readers interested in a deeper understanding of how leather is created. For most consumers or even leather technicians, this post will induce deep yawns and sleepy eyes. You can quickly skip through it picking up on the high points or dive into the details. As such it might be useful reading for an insomniac. With that warning, this outlines a complex process that moves a skin from the point of harvest to a useful material we know as leather.

TANNING
The Basics.... Leather is a natural product. It comes from animal skins which have been chemically processed to preserve them. The chemical procedure used to prepare raw animal hides for use as upholstery, shoes or other applications is called tanning. A properly tanned hide or skin creates strong, flexible leather, resistant to decay.

The majority of today’s leather comes from tanned cow hides, though many types of hides can be used.

TANNING STAGES
Harvested skins enter the tannery facing a multi-step chemical and mechanical procedure. The type of hide and the desired end-product determines what specific procedures are employed for the desired end result.

CURING
Hides are cured first through salting and/or drying the hide after it has been harvested. As hides are normally a by-product of the meat processing industry this step often takes place inside a meat-packing facility. It’s important to do this fairly quickly in order to arrest the natural decaying process.

Hides can be cured in one of two ways:

Brine-curing is the preferred method as it’s quicker and easier. The hides are put in large tubs or vats and infused with salts and disinfectant. After about 12 hours, the skins are completely cured, ready for the next stage.

A more primitive method is Wet-Salting. It’s accomplished by salting the hide, then placing many skins on top of each other making a damp clump of skins. Left to cure for a month, the salt is completely absorbed into the skin, preserving the hide.

SOAKING
Once cured, the hides are soaked and rinsed with water. This rids the skins of salt residue, dirt, and other unwanted materials. Did I just detect a yawn? If so, skip to vegetable tanning section.

FLESH and HAIR REMOVAL
After soaking, the cured hides are processed on a machine that removes all remaining flesh. The hides are then immersed in a mixture of lime and water, loosening the hair from the skin. After about a week, the hair is taken off the hide by machine.


SCUDDING
Scudding is done by humans. Stray hairs, etc., missed by the machine are removed from the hide by hand tools.

DELIMING
Hides are then de-limed with acid. After the lime is removed, hides are exposed to enzymes. This process evens the grain of the leather. The resulting product is soft and flexible leather.

VEGETABLE TANNING
Vegetable tanning agents create some flexibility in the leather, but its primary characteristic is to develop tough, durable leathers. Example application would be luggage, leashes, belts, straps, saddles, and harnesses.

Vegetable tanning is accomplished in large vats where the hides are covered with tannin. Tannin comes from the bark, wood, leaves and fruits of chestnut, oak and hemlock trees. From beginning to end, the hides are exposed to increasingly stronger tannin solutions. As with all tanning, vegetable tanning stops the decaying process.

CHROME or MINERAL TANNING
Mineral or chrome tanning produces softer leathers with more stretch, such as those found in fine purses, upholstery, gloves, jackets, etc.

Initially, the hides are pickled with acid and salt, then, soaked in a chromium-sulfate solution. This process is much faster than vegetable tanning, typically a 1-day project.

SPLITTING
This is kind of important to know. Most harvested cow hides are 1/4 to 3/8 inch thick --- too thick for most purposes. To create the appropriate dimension the tanned hides are split laterally using a machine that's like a horizontal band saw. This process renders an upper and lower image of the hide. The process creates a grain side (top-grain or epidermis) of somewhat consistent thickness. The top grain side is the outer surface and maintains the natural grain. This is also the dominant component of the leather's durability and tensile strength.

The operation also produces an inner portion of the hide known as a "split." It initially appears as suede. Splits have no grain pattern and were historically considered a waste byproduct. Some if it was used for suede garments, book binding and other applications where durability and tensile strength are not required. However some clever chemical engineers developed a process where splits are coated with an epoxy/resin mixture forcing the suede fibers to bind together rendering a smooth surface. Then a machine stamps a mechanical grain pattern into the coated split. This once waste product is applied to furniture and sold as leather. Unfortunately for the unsuspecting consumer, this material lacks the durability generally associated with leather. It's clearly NOT the real deal.

RETANNING
Hides are often reprocessed through the tanning cycle to improve and attain a specific physical characteristic. In many cases a combination is used to develop leathers that have the positive characteristics of each tanning process.

CRUST
A hide that has been fully tanned, but not colored in any way is called a crust. Chrome tanned leather is a light grey color belying the notion that many people have about the “natural” color of leather. Vegetable Tanned leather is the classic tawny color that is most indicative of "natural" leather color.

DYEING
The hides then are dyed. Typically the dies used are aniline dyes. This is accomplished in vats of heated dye solution where the dye permeates the entire cellular structure of the hide. This process may also add moisture back into the skin. Vegetable tanned hides may be soaked with oil, grease and waxes to make them more pliable and give them different use characteristics.

FINISHING
Depending upon its intended application, this step may include covering the grain surface with a chemical compound, then brushing, buffing and sanding the surface. Leathers which are sanded for long periods of time become brushed or Nubuck. The sanding step may also reduce the amount of imperfections in the hide. However, it erodes the epidermis, which is the most important part of the hide, contributing the dominant component of strength. Waxes, glazes, oils, and other solutions may also be added.

PIGMENT COATING
Most upholstery grade leather goes through a final phase. One, or in many cases several flexible, pigment coatings are applied to the leather which determines the color presented on the outside of the hide, then a clear-coat is applied, which determines the sheen. These are protective coatings that enhance the wear, fade and stain resistance of the leather.

Wow, you made it through without falling asleep. The most important thing to take away from this is that not all leather is the same. The process can be very sophisticated producing leather with an expected 30 year or more useful life. It can also produce low quality leather with a life expectancy of a few years at best. To learn more visit our web-site at advleather.com.

Copyright 2009, Kevin Gillan

Thursday, June 25, 2009

Color Matching for Leather Furniture Repair and Restoration

Color is one of those funny things that is extremely difficult to quantify. This is certainly true regarding color of leather furniture. There are loads of variables controlling the color you perceive, from the lighting source to the chemistry construct of the coloring agent (e.g. dye vs. pigment).

Because its so difficult to quantify, most people think in broad terms. Using brown as an example, what version of brown is in your mind's eye? Want to tighten it down further? What does Espresso or Tobacco or simply dark brown mean to you versus the person standing next to you? We all have our own personal version and we're all correct as there is no scientifically established standard, no definitive reference for color definition.

If you are attempting to repair damage on a fine leather sofa, then to conceal the repaired area the color must be exactly matched, else you'll see the difference. The human eye works on detecting contrast. If it's not an exact match, the human eye detects the differential, and draws your brain to its attention. Bingo! You can see the mismatch. Every time you look at the piece, it's what you'll see.

Close enough is not good enough.

Now to dispel a myth. Some color matcher's use a machine (spectrometer). In short, it will get you close, but never exact for a whole host of reasons. Here's the most obvious. The machine is programmed with a specific color chemistry as it's baseline. If the color chemistry you are using isn't the exact color chemistry used to program the device, the machine will interpret incorrectly. If you are painting a wall, you can get away with it, but if your color match requires precision, forget it.

Furthermore, leather furniture often has a mottled coloring technique which presents depth of color as the color variation makes the leather appear more organic. A machine can not read multiple colors simultaneously.

Once again, close enough is not good enough.

Finally there is this intriguing phenomenon known as metamerism. There are multiple versions of this affect, with the most common being the impact of a color your eye records based on the light source. Because perceived color is specific visible light wave-lengths striking your retina, the light source plays a key roll. Incandescent, florescent, halogen, arc vapor, sun all produce differing wave-lenghts. As these wave-lenghts bounce off an object and hit your eye, they influence the color you see. Do a color match under florescent lighting and then view it in sun light and you'll see the difference immediately. For a more complete definition of metamerism check out http://en.wikipedia.org/wiki/Metamerism_(color)

Once again, without the light source being considered, close enough is not good enough.

The professional leather technicians of Advanced Leather Solutions (http://www.advleather.com), color match by eye, in the lighting condition of the leather furniture's location. If that specific light condition can't be recreated, then we opt for sunlight as that provides the broadest spectral reference.

The fail-safe technique we use is very simple. Mix a color that you think you see. Then apply a piece of masking tape to the target leather. With an airbrush or other applicator, color across the leather and over the masking tape. Pull the tape up. If you detect a line, the the color is off and re-mix until you can't detect a line.
That way, you get the color matched perfectly every time.

In our leather technician's training program, it is the subject matter that requires the most time. Coloring matching can be mastered. It takes patience and practice. With experience, a technician gets better and better at it. The most difficult matches involve subtle mottling affects. In this case the technician has to interpret two colors, a base and an overlay print. The interplay of these two colors is what presents as the final color. Our do-it-yourself leather restoration (http://www.DIYLeatherSolutions.com) program success is founded on our technician's creating a custom color mix for a client so the color matches perfectly every time.

We take the guess work out by bringing our experience to the table, because we believe close is not good enough.

As an aside, over a hundred years ago, a painter/scientist named Charles Munsell developed a color quantification system using three variables, hue - value - chroma. His color system comes the closest to a standard and has been used by well-schooled colorists for decades. Check out the Munsell Color Science Labs at the Rochester Institute Of Technology to learn more. - http://mcsl.rit.edu/

Copyright 2009, Kevin Gillan

Wednesday, June 24, 2009

Bad Leather Repair

Look at this picture.


Its a classic example of a consumer using a "leather repair kit" purchased off the shelf at Wal*Mart. Unless a consumer is comfortable with color matching, and repair technique, this is the result.


This consumer not only had to pay for the repair material, but then actually proceeded to make the sofa look worse than if the consumer had simply left it alone.


To learn how to do repairs correctly, look at our web-site http://www.advleather.com and you'll see the difference.

Copyright 2009, Kevin Gillan
Posted by Picasa

Can Leather Colors Rub Off on to Clothing?

One of the most common questions I get asked about a Do It Yourself or professional leather furniture restoration project is: Will the color rub off on my clothes?

It’s a worthy question because there are certain types of coloring agents that will transfer, and others that won’t.

The short answer is that leather dyes transfer, and leather pigments don’t.

Apply a true leather dye (metal complex or aniline dye) to the surface of leather, and dye transfer will occur. The next time someone sits on the leather they’ll be wearing the dye on their clothing.

Whereas apply a pigmented coloring system and there will be no threat of color transfer.

Dyes

The reason is that dyes are free floating, tiny molecules that migrate. They are not made color fast. The dye cannot be “locked” in place if its simply applied to the surface. With a newly tanned hide, the leather can be processed at a tannery such that there is a minimal potential for dye transfer. This is accomplished through heat. The hides are typically dipped into vats of heated dye. The heat sets the dye to the best possible degree. However, take a damp, white cotton cloth and rub it across tannery processed dyed leather and you’ll pull some of the color. In an after market application of dye, you can't stick a leather sofa into a vat of heated dye. So you can't set the dye. The dye will transfer, and quite easily.

One consumer called me in a panic. She purchased Fiebing's leather dye (green) and applied it to her leather sofa. Two weeks later a little girl spilled juice on the sofa. The juice ran off the sofa on to the carpet, carrying the green dye with it. So, not only was the sofa ruined, but so was the carpet.

Pigments

Pigments on the other hand are carried in a specialized chemistry called a “binder” that locks the pigment molecule in place. Most binders are a resin blend of urethanes and acrylics. The combination of pigment and binder is often referred to as a "leather finish." This coloring chemistry renders a topical film on the leather with appropriate adhesion and cohesion properties and when fully cured does not allow color migration or transfer. The key is using a specific type urethane and acrylic chemistry and then getting the blend ratios correct. So if you are going to mix your own coloring system, you should have a solid understanding of chemistry. Use the wrong binders and the color coating will crack and peel.

If a leather technician says he will “re-dye” your leather, he/she probably doesn’t know the difference between a dye and a pigment. If he/she is really using dyes as a coloring agent, then expect the color to rub off. In most cases, the tech is actually using a pigment based coloring system and is referring to it as a dye.

There are two additional Blog entries that offer greater detail explaining the difference between dyes and pigments. They are entitled “Leather Furniture – Dyes or Pigments” and “Leather Color and Attributes.”

Of course you can learn more at our web-site http://www.advleather.com or http://www.DIYLeatherSolutions.com. You can also call our tech line to get more information about Advanced Leather Solutions, or if you simply have a question, we’ll gladly respond. We can be reached during normal business hours in the US at 510-786-6059. For time zone calculations, we’re located in California.

Copyright 2009, Kevin Gillan

Tuesday, June 23, 2009

How to Resolve Ink Stain on Leather

In the interest of disseminating accurate and complete information about leather furniture restoration and repair, I wrote this post for people who have the common problem of ink on their leather furniture. There's lots of misinformation on the web about ink on leather. So, here are the facts.

Ink on leather? It's a common problem and completely solvable. The only question is if it requires professional attention or, can you resolve the issue yourself.

First, the basics:

1. Ink is primarily a dye. As such the ink has recolored the leather. It is not harmful to the leather. So the problem is strictly aesthetic.

2. If you can get to it quickly, then using a damp cloth, attempt to transfer as much ink off the leather as you can before it sets in the leather. Gently wipe or blot. In a short period of time, the ink travels into the leather. Don’t rub or you’ll push the ink into the leather, and possible rub out the leather’s grain pattern. Keep in mind that once ink penetrates into the leather it essentially has recolored the leather. No amount of aggressive rubbing will change that fact. You might also try a soft artist eraser, gently tracing the ink line. The objective is to pull the ink out before it has a chance to set.

3. Once it is set, removing ink from the leather is NOT a cleaning issue. In almost all cases any cleaner used that is strong enough to pull out the ink, won’t know the difference between the color of the ink and the color of the leather. Aggressive cleaning may pull out the ink, but will also pull out the leather color as well. And, aggressive cleaning chemicals will do more harm (pH damage) to the leather than the ink.

4. The use of ink sticks or other products advertised to remove ink is risky business. The active ingredient is a solvent intended to neutralize the ink. Its success depends on how sensitive your leather is to chemical intervention. If the finish on your leather is chemically resistant it may work, but then again, it may pull the color out of the leather, may simply smear the ink around, may pull the protective top coat from the leather, or may not do anything at all. Ink sticks and the like are clearly a “Buyer Beware” issue. Be careful.

5. Consider this --- one attribute of ink is that it migrates. That is to say the ink moves. This means that an accidental ink stripe may be absorbed into the leather and present a gradually fading reference that dissipates within a few weeks. So, a minor ink stripe may disappear of its own accord. Therefore, as time is not critical, leave it alone for a few weeks and see what happens. It may disappear altogether or become faint enough that it is no longer be an issue. However, if there is a high concentration of dye (i.e. permanent marker like a Sharpie pen) or a larger volume (ink spill) then what you see will be there for a long, long time.

6. If it hasn't dissipated on its own accord, or doesn’t responded to your gentle cleaning attempts then it’s probably time to turn it over to a professional. There is a two step process to resolve it.

A solvent, (e.g. denatured alcohol) is used to neutralize the ink, knowing that it will in all likelihood affect the color of the leather. If you want to try this step yourself, then use a Q-Tip or like device moistened with alcohol and trail down the ink line. Keep turning the Q-Tip to a clean area so that you don’t transfer the ink that has been absorbed by the Q-Tip back on the leather. If the ink has been neutralized, and you haven’t disturbed the color, you’re very lucky.

If the color has been affected, then it’s on to step # 2. Using an airbrush, and the properly mixed leather color, the offended area is airbrushed and viola - the problem disappears. The final step is to apply a top coat with the air brush. The top coat is the primary protection on the leather and it also dictates the sheen.

It is important to note that simply coloring over the ink is likely not effective. Remember, one of ink’s attributes is migration. If you simply color over, then the ink will migrate up through the color coating and present itself all over again.

Once ink has set, ink removal from leather generally requires a professional as the key to success is color matching. Without experience, color matching can be very difficult. A final consideration is the type of leather. The more delicate the leather, the more difficult it will be to extract the ink and apply color so that it is undetectable. For more information about this and other issues associated with leather, go to http://www.advleather.com.

Copyright 2009, Kevin Gillan

Monday, June 22, 2009

Leather Types Found on Leather Furniture

The following information set is a critical foundation for understanding the attributes of various types of leather found on furniture and in automobiles. How the leather is processed at a tannery determines its "type." Consumers shopping for leather furniture should know what type of leather they are buying so they can understand what to expect. For the professional leather technician, knowing the leather type is essential to successful leather repair or restoration. Making a mistake in assuming that the leather is one type, when in fact it’s another can have disastrous consequences.

This foundation of knowledge is so important that during Advanced Leather Solutions technician's training program, it's presented in the first lesson. In this post, each leather type is explained with a definition and attributes statement, depicting both the advantages and disadvantages. To learn more go to www.advleather.com. The web-site is loaded with good information about the care and maintenance of leather furniture, and automobile grade leather.


Finished Leather – Top Grain

Definition: Typically chrome tanned leather representing the epidermis of the hide. It is aniline dyed then a topical pigment coating and clear coating are applied to the surface. These coating represent the color and sheen on the leather.

Attributes: If it’s a top-grain leather, then this is the most durable type of leather as it has the strength of a top-grain and the protection of a urethane coating on the leather.

Advantages: Highly durable, will withstand the rigors of an active household or commercial environment. It is fade and stain resistant. Easy to maintain, this leather will last many years if properly conditioned. This is the correct leather for an active household environment.

Disadvantages: If heavily coated, the leather can feel stiff, and cold.


Finished Leather – Split-hide

Definition: Chrome tanned leather representing the flesh side of the hide that is split away from the top-grain. It is aniline dyed then a topical pigment coating and clear coating are applied to the surface. These coating represent the color and sheen on the leather.

Attributes: Because it’s not the top-grain, this leather lacks durability. It’s an inferior grade leather without the tinsel strength of top-grain, consequently will have a short useful life expectancy. Split-hides are typically heavily pigmented with a heavy urethane clear coat.

Advantages: Affordable. It is fade and stain resistant. The leather is easy to clean.

Disadvantages: It is heavily coated. The leather feels stiff, and cold. Splits do not have durability.


Unfinished, aniline-dyed Leather

Definition: Chrome tanned top-grain leather. The leather is a called a crust (no finish) with aniline dye infused within the cellular structure of the skin. These are typically the most expensive hides. Only a small proportion of all leather can qualify to be unfinished as they are the hides with the least amount of unsightly hide characteristics like scaring or other anomalies in the leather. A variation is semi-aniline which is aniline dyed leather with a light protective coating.

Attributes: This is soft, supple leather that has a wonder feel, and look. Aniline dyes are translucent. As such, they accentuate the natural beauty of the leather. Because it’ the top-grain, this leather has plenty of physical durability.

Advantages: The initial look and feel of the leather can’t be beat. Warm and inviting, with a wonderful eye appeal this leather represents the best of the best.

Disadvantages: It stains and fades. While it is aesthetically beautiful at the on-set, this leather is vulnerable, particularly in an active household environment. Very difficult to keep maintain. It is very porous and will absorb body oils, etc more readily.


Pull-up or Oil Tanned Leather

Definition: Chrome tanned top-grain leather. The leather is infused with aniline dye that is “floating” in an oil mix. This means the dye is not bound to the leather. Rather it can move inside the hide, showing areas of color loss when stretched, scratched or scuffed. This leather is often called distressed or referred to as the “bomber jacket look.”

Attributes: The leather has a certain classic aged look. Again, the dyes accentuate the natural beauty of the leather, and because it’ the top-grain, this leather has plenty of physical durability.

Advantages: The look and feel of the leather presents the distressed look that is very popular. The distressing effect helps to conceal stains. Because it’s intended to be distressed, staining and fading are less an issue.

Disadvantages: It does stain and fade. It is very porous and will absorb body oils, etc more readily.


Bi-cast Leather

Definition: Chrome tanned split leather or leather composite (like fiberboard) with a very heavy urethane coating. The urethane coating has a dye infused so the color is embedded in the coating, not the leather. It's typically a shiny darker brown in color.

Attributes: This is very low grade leather with little tinsel strength. The primary strength is the urethane coating. While the initial look is appealing, it has a short life expectancy.

Advantages: This is low-end leather that is affordable. It’s easy to clean.

Disadvantages: Very short life expectancy. If it fails, it’s not easy to repair.


Suede

Definition: Chrome tanned that can be the top grain or split. This is the flesh side of the leather. It represents the nap created when the cow hide is split.

Attributes: This leather has a nap to it that presents a soft appearance and feel. It is aniline dyed with no protection. If it’s the top grain turned inside out, then it will have the durability normally associated with leather. If it’s simply the split, it won’t

Advantages: It offers a warm inviting look. Feels comfortable to the touch with a depth of color only a dye can offer.

Disadvantages: It fades and stains easily. It is very porous and will absorb anything that comes in contact with it. It’s very difficult to clean.


Nubuck or Brushed leather

Definition: Chrome tanned, aniline-dyed, top-grain that has been sanded to raise the nap.

Attributes: Like suede this leather has a nap to it that presents a soft appearance and feel. It’s aniline dyed with no protection.

Advantages: It offers a warm inviting look. Feels comfortable to the touch with a depth of color only a dye can offer.

Disadvantages: It fades and stains easily. It is very porous and will absorb anything that comes in contact with it. Like suede, it’s very difficult to clean.


Belt leather

Definition: This is vegetable tanned leather that is highly durable and very strong. In leather furniture it is used as components that are load bearing. Examples would be Wassily and Barcelona (the support straps) chairs.

Attributes: Tough and durable, this leather will withstand years of use and continue to perform as expected. It requires very little maintenance. It's available in both finished (pigmented) or unfinished (raw) forms.

Advantages: Long life expectancy, durable. Requires little to no maintenance.

Disadvantages: Stiff with little suppleness, like a saddle, can be uncomfortable. Unfinished version will stain readily.

There are a number of other leather types from exotics like hair-on hides or stingray, to very delicate leather like lamb, calf or kidskin. These are not normally applied to leather furniture as they lack durability, and are extremely sensitive to staining and fading.

For more information be sure to visit www.advleather.com.

Copyright 2009, Kevin Gillan

Saturday, June 20, 2009

Aniline Leather Color Change Slide Show

Pure aniline dyed leather furniture is a challenge to maintain. The words "pure aniline dyed" means there is no protective coating applied to the leather. This classifies the leather as unfinished where the color presentation is strictly a dye in the leather. It's initial beauty both visual and tactile can't be beat. The problem is that it fades (UV sensitive) and stains (very absorbent) easily. To learn more about aniline dyed leather, click this link Leather Care.

As leather furniture restoration professionals we're often required to restore faded or stained aniline dyed furniture. And, the next logical question from the client often is, can the color be changed?

The answer is yes. The color can be restored to the original, or the color of your leather furniture can be changed. Its a procedure that we do professionally, or can supply you with the do it yourself (DIY) color enhancement system provided by Advanced Leather Solutions.

The procedure offers additional advantages in that the coloring system provides a protection addressing the two vulnerable issues with an aniline dyed piece.

1. Fading - The coloring chemistry is pigment based, not dye based. Pigments fade far more slowly than dyes. So, leave the furniture in the same environment for the same time period, and you will not see any where near the same fade rate.

2. Staining - The coloring restoration process also applies a protection to the leather. Think of it as a moisture hold out feature. So if something spills, it doesn't immediately soak in. You have the opportunity to blot the spill up before a stain develops.

The process not only can create a different color for your leather furniture, but it can create a mottled coloring affect. This means that the end result mimics what is naturally seen with aniline dyed leather furniture. With this system, the coloring process creates an organic look and feel consistent with what you'd expect on fine leather furniture.

View this annotated slide show to see the step by step process for a color change.

Aniline (unfinished) leather to color coated (finished) leather with color change to brown.


For more information, contact Advanced Leather Solutions at 800-541-5982, or send an e-mail to Kevin@ADVLeather.com. Visit our web-site for detailed information about the care and maintenance of leather furniture. www.advleather.com

Copyright 2009, Kevin Gillan

Friday, June 19, 2009

Why Not Use Saddle Soap on my Leather Sofa?

Over the years we've heard countless times that consumers have been using saddle soap on their leather furniture. After all, it seems like the right thing to use as certainly saddles are made from leather.

Despite what it seems like, it’s a mistake! You see, leather intended for saddles and leather intended for furniture are processed very differently.

Saddles are made from heavy-duty belt grade leather which is processed using vegetable tanning. The hide is "veg-tanned" so the leather can tolerate the harsh environment of the outdoors. Vegetable tanning produces toughness and durability. To a rider, this means the saddle is hard and uncomfortable. Saddle soap was originally chemically engineered to help soften saddles. It accomplishes that goal because of its alkaline nature.

The significance is that leather is acidic on the pH scale. Its pH is 4.5 to 5.0. (Water is neutral at 7.0. Any pH higher than 7 is alkaline and lower than 7 is acidic.) Saddle soap is up around 9 or 10 on the pH scale. When you apply it to a saddle, a chemical reaction occurs within the leather that breaks down the fiber structure, softening the leather. Because vegetable tanned leather is so durable, it can withstand the chemical reaction without turning the leather to mush.

Upholstery leather is processed differently. Using chromium chemistry, this tanning process imparts soft and supple characteristics and not the same toughness as veg-tanned leather. However, the leather's pH is still around 4.5 - 5.0. Saddle soap introduces alkalinity causing a chemical reaction with the acidic nature of leather which weakens the fiber structure and reduces durability. Your leather furniture will not hold up like a saddle. Saddle soap is chemical warfare attacking the leather's structural integrity, shortening the life of your fine leather goods.

Think about your own skin. Would you wash your face with a strong alkaline household cleaner like 409? Certainly it would clean your face, however the effect it would have on your skin is not desirable, particularly with repeated use. The same is true for upholstery leather.

To prolong the life of your leather (furniture or automobile) it’s important to use leather cleaners that are chemically engineered (pH balanced) specifically for upholstery leather. If you would like more information about appropriate upholstery leather cleaners and conditioners, visit the Leather Care page at www.advleather.com.

Just remember, as the name implies, saddle soap is for saddles, not furniture. Keep it in the barn where it belongs.

Copyright 2009, Kevin Gillan

Friday, June 12, 2009

The Bane of Bicast Leather

About 3 years ago I published an article on our web-site and also in electronic form through an on-line magazine entitled "Bicast Leather Invasion". The article has generated about 12,000 hits to date, indicating the popularity of bicast leather.

The attraction of bicast is its low price point. People are buying leather furniture manufactured with bicast despite the fact that bicast is a low grade "leather wanna-be" that lacks durability. Consumers, thinking they are getting a bargain are in fact getting what they paid for - a cheap imitation of the real deal.

So, as leather technicians, we're faced with the reality that consumers are having problems with their bicast leather furniture. Tears in the bicast leather are appearing seemingly spontaneously, typically on the top of a seat cushion. The actual source of the tear is the inherent weakness found in bicast. The problem for a leather technician is that the traditional leather repair techniques won't work with bicast leather. The standard model for leather repair assumes that the leather's fiber structure surrounding the damage has integrity. The repair is then "anchored" to these non-damaged fibers allowing the wound to be permanently "healed." This reliance on the durability of the material around the damage is essential to the repair's long-term viability. In other words with the standard model, the quality of the repair is a function of the integrity of the leather. Given that bicast is inherently weak, the standard model has to be modified. Damaged bicast requires a different approach to repair if the goal is to offer the best shot at a long lasting repair.

To that end, Advanced Leather Solutions has published on YouTube a two part video sequence demonstrating this bicast leather repair strategy.

Here's Part One...


And Part Two...


After reviewing these videos, you may still have questions. You can learn more at our web-site www.advleather.com, or call our technical help line at 510-786-6059.

You may also care to read the original "Bicast Leather Invasion" article published through ezinearticles.com

Here's the URL http://ezinearticles.com/?Bicast-Leather-Invasion&id=368242

Copyright 2009, Kevin Gillan

Tuesday, June 9, 2009

Cat Scratches on Leather Furniture

Cat got to your leather?

One of the most common leather furniture restoration and repair projects our leather technicians work on is cat claw damaged leather. In an average year, we at Advanced Leather Solutions repair over 10,000 individual cat scratches on leather. That number is conservative as we've seen leather sofas come into our shop in Hayward, CA with over 1,000 individual scratch marks. It's such a popular problem that we have produced a "Cat Scratch on Leather Repair" DVD based video for our Do-It-Yourself (DIY) clients.

Solving the problem requires a two step process. 1. Fill the wound with a synthetic material chemically engineered specifically for leather (not for vinyl). 2. Color over the offended area, disguising the damage.

The filler acts like synthetic scar tissue, filling the void created by the cat claw's penetration into the leather. And then the color is applied to conceal the repaired claw mark. When done correctly, the cat scratches either disappear from view completely or will appear to the casual observer as a natural characteristic in the leather. Use the right materials and the repairs will last the life of the furniture.

The key to disguising the damage is getting the color right. Color matching is an art form that takes lots of practice to master. It's very difficult to "nail" the color without experience. And, if the color isn't right, the repairs will stick out like a sore thumb. In an earlier posting (The Real Facts About DIY Leather and Vinyl Repair) I uploaded this photo that shows a consumer's attempt to repair cat claw damage and then conceal with a color they mixed themselves from a leather repair product they purchased on-line.


Clearly, not exactly a good color match. An Advanced Leather Solutions technician had to strip off this wrong color and re-color to save the furniture.


Here is the result after an Advanced Leather Solutions technician saved the day...


If you don't want to spend the money for professional leather repair, then the best solution for a do-it-yourself project is to have professional involvement at the color matching stage. The rest is fairly mechanical. With good "How To" documentation, especially if supported with video, the actual repair process is fairly easy to master. With the leather color professionally matched, you'll have the best shot at making those pesky cat claw marks disappear.

The following is a brief demonstration of cat claw damage repair that I've uploaded to Piscasa. The Cat Scratch Repair DVD from Advanced Leather Solutions shows the repair procedure in much greater detail.

Cat Scratch Repair


TO learn more, visit my web-sites at http://www.AdvLeather.com/ and http://www.DIYLeatherSolutions.com/

Copyright 2009, Kevin Gillan

Saturday, June 6, 2009

Can Leather Furniture be Restored?

As leather furniture restoration professionals we are often asked if a particular client's leather furniture can be restored. The success of our professional restoration or our Do-It-Yourself Leather Restoration system is predicated on the integrity of the leather. While the leather can be badly soiled, stained, surface scratched and faded, as long as the basic fiber structure of the leather is sound (epidermis is still intact), then the system works beautifully.

Through digital pictures sent via e-mail I can generally tell if your leather furniture meets our criteria. Bottom line is if the existing leather is in good shape, you can expect excellent results.

If there are fissures or cracks in the epidermis, then that is not a good sign. Check out this picture as an example of leather that must be replaced.


When we do encounter serious epidermal damage, we can still save the piece by selectively replacing offended panels with new leather, color matched to the original. In this case we replaced the headrest, seat and both arms with new leather, color matched to the original and restored all other leather panels.


-----------------------------------------------------


If the finish is simply worn away or stained or faded, but the leather itself is not damaged, then the leather can be successfully restored. in this case, there was no epidermal damage, just fading and wear. So, the leather sofa was an excellent candidate for restoration as you can see. This piece was professionally restored by Advanced Leather Solutions, but a DIY kit will accomplish excellent results as well.


There are two approaches 1. Professional leather furniture restoration (check out http://www.AdvLeather.com/)or 2. A do-it-yourself leather restoration process (look up http://www.DIYLeatherSolutions.com/).

In either case, the key to success is to have some level of professional involvement. It's important to know when the leather can be saved or when it has to be replaced. For example, if the piece is a bicast leather, then its not worth investing any money in restoration as the basic material itself is inherently weak. As a professional, before I offer advice, I want to analyze photos. Like a doctor examining an x-ray, I am looking for clues that tell me if the leather can be saved and what procedures are required to restore the leather. You see, there isn't a single solution that can be used to satisfy every condition. If there are body oils in the leather that has to be resolved thoroughly and completely as the first step. Additionally, the nature of the leather determines the type of primer required. So for the do-it-yourself community, highest probability of success still requires some professional guidance from people who actually do this work.

Professional restoration of leather furniture turns the project over to pros who know what they are doing. This can be expensive. If the furniture is decent quality, it is worth every penny as a pro will return the piece to like-new condition.

If you are a do-it-yourself type person, then creating a custom kit specific to your furniture is the correct answer. A customized kit from Advanced Leather Solutions will include everything you'll need to get the job done. The fee structure is not about quantities of material as much as it’s about making sure they are the RIGHT materials for your specific leather (e.g. colored matched to your specification and appropriate primer for your leather). As professional leather furniture restorers with 20 years experience in doing this work for our clients, we know what works and what is a prescription for failure. With Advanced Leather's program you're tapping into professional experience, not just buying products.

For the DIY community, with a little bit of money and some time, leather furniture can be restored back to its original glory.

copyright 2009, Kevin Gillan

Friday, June 5, 2009

Body Oil in Leather Furniture

As leather furniture restoration specialists we commonly find body oil accumulation in leather. We find it in the head rest and arm rest, or where skin is in contact with leather. Leather is absorbent. Whether it's a comfy leather recliner, or favorite seat on a sofa, the output of a skin pores gradually penetrates into the leather fibers. We'll also find it in the leather of a seat cushion if it's the favorite place for a dog to lay or the cushion's leading (front) edge in a home where people commonly wear shorts exposing the back of their legs to leather.

Body oil may show itself in a few months or in many years. It's a function of several variables --- length of time exposed to skin, chemical nature of the person's pore output, chemical resistance of the leather as examples. We have also discovered that people who are on certain medications will have their body chemistry altered by these meds, making their body oil more caustic.

Mistakenly, people interpret body oil accumulation in leather as soiling or dirt and attempt to clean it away. It's not a cleaning issue as the oils are in the leather not on the leather. It's like trying to clean a tattoo in skin. A cleaner will remove whatever dirt particles are sitting on the leather, but won't touch whatever is deeply embedded in the leather.

For the do-it-yourself (DIY) leather restoration folks, or for professional leather technicians, body oils present a problem on three levels.

1. They are visually offensive (big nasty looking dark or soiled spot in the leather).
2. The oils penetrate through the colored coating on the leather, eroding adhesion of that color coating.
3. The chemical output from a person skin is caustic to leather as there is a pH differential between leather and human. This differential creates a chemical reaction in the leather that breaks down (rots) the leather's fiber structure. If the problem is not address soon enough, the offended leather panel cannot be saved.

The staining can be resolved by the application of color over the offended leather area. However, before re-coloring the leather, these body oils have to be removed. If you simply color over the body oil, the new color won't adhere properly and will peel up.

The leather restoration pros at Advanced Leather Solutions have developed a specific procedure to draw these offending body oils out of leather. It involves an oil extraction chemistry applied to the leather that passively removes the offending oils. It often required multiple applications of oil extractor to ensure all the oils are removed.

The following video sequence found on Piscasa demonstrates the oil extraction procedure from leather. CLick on the picture to see the video sequence. And, to learn more, visit www.advleather.com

Body Oil Extraction, Leather Furniture


copyright 2009, Kevin Gillan